Take control of your school’s finances like never before!
Dive into our two-part video series on the Classter Financial Module, where we unpack powerful features designed to simplify your financial processes and enhance budget management. You’ll learn how to streamline invoicing, track payments, and manage expenses—all in one place! This engaging series not only highlights the module’s value and benefits but also offers you the chance to download the transcript as a handy written guide. Don’t miss out on this opportunity to transform your financial operations and make budgeting a breeze. Watch the videos now and empower your school to achieve financial clarity and efficiency!
Transcript
00:02
Hello again. Now that we’ve covered some basic things in the financial configuration, let’s take a look at how some of what we did in the previous video appears.
00:11
To start, let’s log in as an admin, as you can see here. Then we can take a quick look at, uh, the module.
00:21
First, let’s go at the dashboard here, to financial, and then let’s go to financial overview. At financial overview, you can have a quick view of the institute’s total agreed amount, the amount paid, and the balance of the current period.
00:39
Additionally, you can add the total balance of all periods and the total outstanding amount of all periods. You can see all these at the quick view here, so you can have an idea of what’s going on.
00:59
Use the Filters here. So that I are available to see analytically per student or per agreement the installments of a selected period.
01:08
You can check payments up to a specific date and show payments up to the same date or a different one.
01:14
You can select to show installments of students with specific stages of course. First of all, here, you can see the view type you want per installment, per student or per arrangement.
01:25
Let’s choose per installment for now. Uhm, here you can select the students with the specific status. Here we have register, but you can select anything else you want.
01:42
Uhm, let’s, uh, choose a date, uh, that includes only payments until then. Uhm, okay, and let’s search.
01:58
You can also use other type of filters here. Uhm, or more of these, uh, if you want, uh, to search something specific.
02:09
Here you can see a list of, uh, the installments. You can also print this list. You can export it, uh, as a .csv or, uh, an .xlx file, and so on.
02:23
From Embalm Actions you can do a lot of, uh, different actions, uh, for example, send financial notification, uh, you can, uh, uh, change the student status.
02:37
You can create, uh, a remark or action, you can add to calendar event, uh, you can edit the pay date, and so on.
02:45
Uh, you can also include only outstanding installments, and if you select, uh, the view type per student, you can include general lender balance, uhm, and, uh, transactions not related to arrangements.
03:00
At, uh, the reports menu up here, uh, you can find a variety of billing reports available. You can see that, uh, there are a lot of, uh, reports.
03:14
Uh, now let’s go to arrangement list. At the arrangement list, you can see all the arrangements or you can use the filter to see specific ones.
03:25
Uh, for example, um, here at the arrangement type, let’s choose a service at level we use. We have middle school or you can choose anything else at here.
03:37
We have year six at stream. We have standard and let’s see. So you can see all the service arrangement types here, and you can see a more specific, uh, description of the type, uh, arrangement.
03:56
You can see a lot of columns here with a lot of details. You can see the name of the student that all these arrangements refers to, of course.
04:07
You can use the buttons above the result area up here, uh, to print, export and select, uh, results. You can also use the Manage Columns button, uh, here, column options, uh, to hide or show information that, uh, you won’t.
04:30
Then we have the transactions. You can see all transactions in full detail for the selected period. Uh, here you can use the date filters, uh, or you can use, uh, the receipt number or student filter to filter the list further.
04:47
These two, I mean. Let’s choose, uh, last seven days, maybe. We have some transactions here, as you can see.
05:04
Uh, you can review the transaction from the action button right here. Um, the report is being, uh, rendered.
05:21
You can see here the invoice, uh, the charge type, the description, and the amount. And you can also see the current period balance down here.
05:32
You can print it or you can save it. You can as PDF if you want to. Um, you can also print, uh, this list, uh, or export it if you wish.
05:49
Then we are going to Mass Billing. Use Mass Billing to bill all selected items. Use the filters to show transactions corresponding to the selected criteria.
06:02
Here you can find, uh, all the filters you need. Uh, here we have a registered status, a controlled date, uh, tomorrow.
06:11
Let’s put middle school. Um, here’s six. Stream standard six, uhm, class year six B. And show.
06:24
Uh, you can use the transaction data area, uh, to specify the transaction details here. here we have automatic transaction type invoice, uh, date, and you can see the payments account employee as we said, uh, in our previous video that you can, uh, select this one.
06:51
You can also select the one transaction per student, uh, now we can see multiple transactions per student as you can see here with a lot of details and, uh, you can see the balance to be build it up, uh, until today for example, uh, you can see the build amount, um, you can see the grid amount, you can
07:18
see a lot of things, a lot of helpful things. Um, enable the use common date for all transactions option to set the common date for all billing actions, alternatively you can end there’s the- specific date on the issue date column of the selected entry.
07:35
Ah, that’s up here. Um, as we said, you can select the payments account employee.
07:51
Bye-bye. Um, you can also select the transaction type, uhm, and enable the build specific installment option if you want to build only a specific month installment, uhm, for here.
08:09
Let’s go to the list of payers. Use this function to view payers in their financial overview. Additionally, you can view students connected to the selected payers and statistics of payers’ financial data.
08:22
Uh, use the level course and, uh, other student filters to show corresponding payers. Um, let me mention that the payer could be a parent, company, a student, or whatever.
08:36
Ah, let’s, uh, good middle school, year six. And let’s choose, uh, Francesca, for here. And search. Here we can find, uh, the payer connected to Francesca.
08:51
It’s- John Gristi. And we can see a lot of details about John. Umm, we can see the tax ID, the total agreed amount, the total payment amount, uh, the balance from other periods, and so on.
09:06
on. Umm, as an augment, things might seem a bit confusing at first, but if you refer to more detailed videos or the manuals, you can resolve all your questions.
09:22
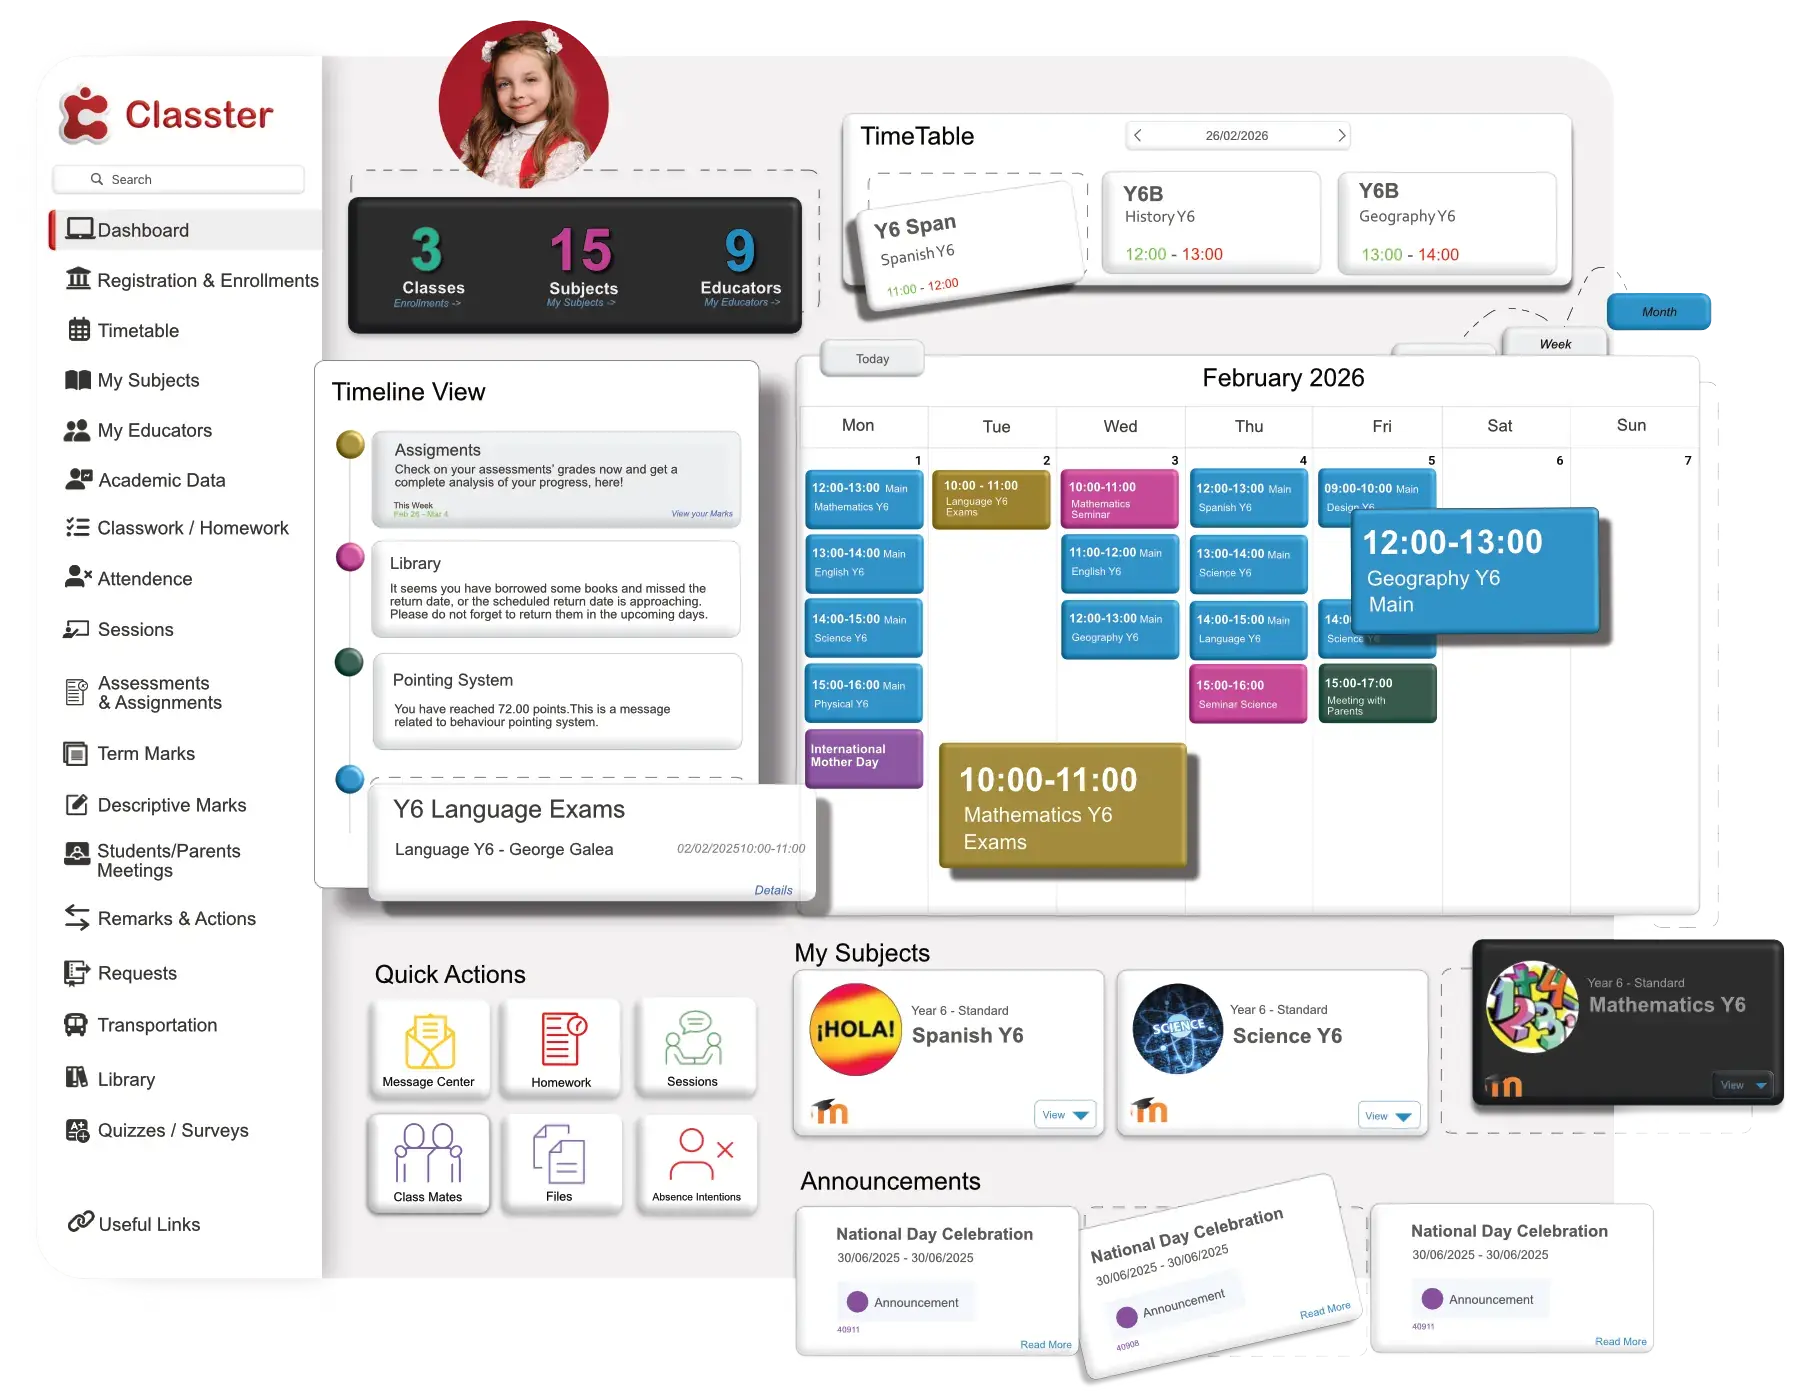
Also feel free to contact us if you encounter any difficulties. Now let’s take a look at how a p- first on a parent portal, it’s incredibly simply and very helpful.
09:32
I would say for a parent. So just a second. Okay. And now we have a look in as John Grick’s Day as, uhh, as we said, the little minutes before, uhh, Francesca’s father.
10:06
So let’s go to financial and let’s see. Here we can see the financial arrangements from Francesca. This is an overview.
10:16
You can see the total payment, the grid amount, the balance, and so on. You can also see some statistics, and you can see instalments per arrangement.
10:26
Here, all the, all these. That are read, means that the date is before today. Um, from the financial tab, this is what you’ll see once you’re looking.
10:41
At the top, you can select which child’s financial information you want to view. Um, here, um, there are- There are more siblings, marks, Helen, and so on.
10:51
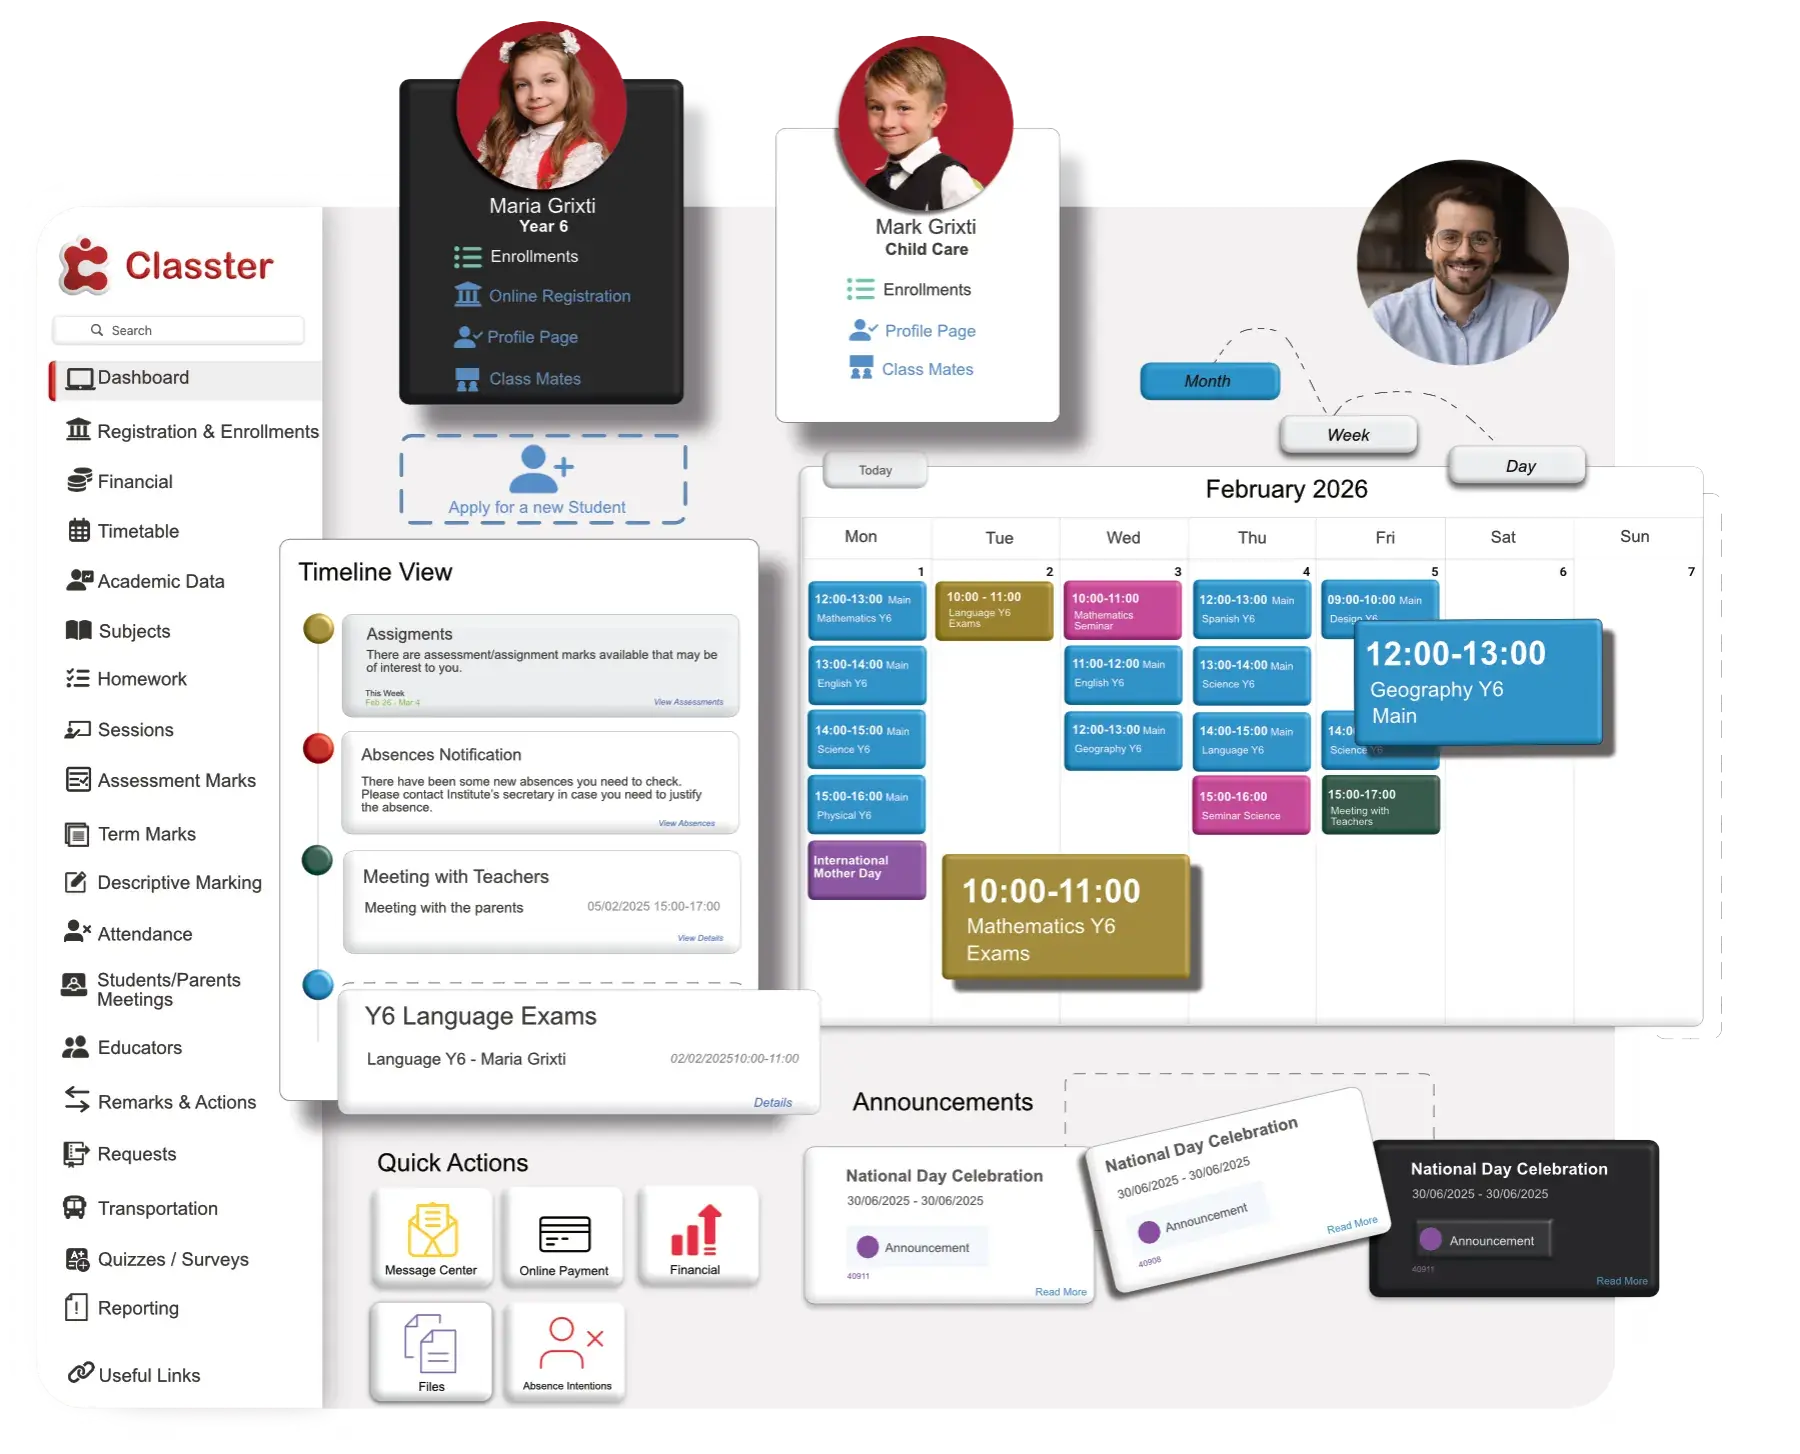
Um, just below the children name, you can see their RF code and the chart of the financial transactions here. You can also make an online payment if you wish.
11:05
Bye! Um, you can choose the year you want to see here. And that’s all. On the top right, you can see a summary where you can view the agreed amount, your payments.
11:17
You can also make online payments and could you take financial information further down. All this we just said. Umm, to other portals are quite similar.
11:29
Umm, when I say other portals, I mean maybe university students, other parents and so on. Umm, all these portals are designed to be helpful for the user, allowing them to stay, on top of payments and keep track of their transactions in balance.
11:50
Hope all these work helpful for you. If you need anything, feel free to contact us. Bye bye for now.
FAQ’s
The Classter Financial Module is designed to streamline tuition fee management, allowing schools to create and manage financial arrangements, payment plans, invoices, and monitor outstanding fees effectively.
The module allows you to manage various transaction types, including invoices, fees, discounts, and payment methods, all tailored to your institution’s financial requirements.
You can easily print or export financial transaction lists in Excel or CSV formats, enabling efficient reporting and analysis of your school’s financial performance.